Egg Incubation Techniques
(See Incubator Pics)
I have written this to provide a starting point for anyone who is not well versed in the methods of egg incubation of colubrids, pythons, turtles and lizards. This is a general starting point and some species may be a bit more exact. Take notes whenever dealing with your success or failures, this helps you identify mistakes and acts as a future point with the eggs of that species for yourself and others. The points here are intended as a point of reference, I write these sheets as I go, I ramble! I take the eggs away from all reptiles including maternally incubating snakes, this allows me a greater level of control over the eggs and the incubating environment.
Incubators - Provide a rigid temperature environment. Most eggs have a fair degree of tolerance for temperature fluctuations for short periods. Since the developing embryo is dependent upon its immediate ambient temps it is critical to keep temperatures stable to provide an ideal situation and avoid the chance of birth defect related to inappropriate incubating temps. Buying an incubator is the easiest and perhaps the best choice if you are breeding any egg laying species. My first choice would be the incubators sold by Neodesha Plastics/Bush Herp. (1(800)451-6178), this one is ideal, I helped provide the concept and design it! This one incorporates a false wall, and a fan where air is passed over the heating element. Hovabators are used with a fair degree of accuracy but I have little knowledge of them.
Incubator Concept - This is a critical point, please read and understand if you wish to have success! The eggs are contained typically in a tupperware style vessel that has a few if not a single vent hole. This container is placed in the incubator. The incubator has a heating source that is controlled by a thermostat; rheostats on incubators are inappropriate since they are not self regulating and you can find thermostats for an inexpensive price. The air around the egg chamber will change as the heat source fluctuates as the thermostat calls it. The egg chamber acts as a buffer and the temperatures inside change slowly, this is the key. If the temperature is immediately effective upon the eggs there will be a greater chance of development mishaps!! The PROBE OF THE THERMOSTAT MUST BE PUT INTO THE EGG CHAMBER, do not put it outside of the egg container since this will create unstable temps. DO NOT LOCATE THE EGG CONTAINER ON THE HEAT SOURCE, this can and will create hot spots that will damage the eggs! Raise the container up to prevent this potential problem. Use two digital thermometers that are first matched by locating the probes in a glass of water to measure the readings. If they vary use a normal accurate thermometer to decide the correct temp and then mark the deviation on each of the digital therms. They can then be used with a greater degree of accuracy in your incubator. I like using two, this ensures I will have no surprises down the road. I strongly suggest using a fan or two (depends upon incubator size and air path) within the incubator, the fan should be controlled by the thermostat. This ensures that the air surrounding the egg container has mixed well with the heat source and there will be less chance of hot spots.
An Ideal Incubator - Will
have the following points.
1. A quality thermostat to
control the temperature, probe types are best. A simple on/off type works
well, proportional ones are great but no better in this situation. I not not
like chicken wafer style thermostats, they are crude and difficult to use
within my incubating scope.
2. The probe of the
thermostat is located in the container that houses the eggs.
3. A false wall/cavity that
contains a heating element such as heat tape. This provides a buffering of
hot sudden temperatures that could lead to an incubation disaster.
4. A fan or fans to draw
the air across the heat tape contained in a false wall. Ideally a fan
located at the top of the false wall to push air in and across the heat tape
and another to draw it out of the bottom and recirculate through the
incubator.
5. All eggs are contained
in tupperware/shoebox style containers where the humidity is controlled
within. These are critical since they create further buffering of the
changing temps within the incubator. A single or few air holes in that
container are all that is needed to provide air to the developing eggs. make
sure you locate the thermostat and digital thermometer probes in this
container.
6. Accurate temperature
monitoring. Digital thermometers are cheap and ideal, the use of two is wise
to ensure true readings. Locate temperature probes in the egg chamber for
critical temps.
7. Air baffling that does
not allow the newly heated air to blow directly on the egg container, we
want the air to warm the outside of the egg container evenly. All air
surrounding this container will fluctuate a fair bit but the temperatures
within the container stay remarkably constant with only slight deviation.
8. A predictable air path.
If you are incubating large numbers of eggs then create an air flow across
each box with baffles. Ideally, create a zig zag pattern of air, this
creates even temps and avoids the dreaded hot spots that can destroy some if
not all of your eggs.
Egg Substrate - I suggest the use of Vermiculite. It is easy to obtain through and gardening store and very inexpensive. It holds water well and harbors no detrimental organisms at purchase. I also have used perlite for some lizard eggs, this can be tricky stuff to use since if the humidity is not kept properly it can and will draw moisture from the eggs that sit on it. I will not try to explain the incubating technique with this substace because I am not confident that I can explain it well enough for it to work well. Remember reptiles look for a place of high humidity and warmth to lay their eggs. If the substrate is too wet or too dry it will destroy the eggs.
Humidity - This is a critical point and varies from species to species. I will not discuss this in terms of a gauge, I never use one but depend on reading the eggs and the level of moisture within the egg chamber. We are typically thinking of levels of 90-100% ambient humidity. Some lizards(Uromastyx, beardies etc. arid region critters) will suffice with lower levels. Some eggs may demand more moisture while others will die if the humidity is excessive. Remember, we are imitating what the adult animal and nature naturally provide. We often tend to go overboard on the moisture content that we provide. General rule of thumb is to add small amounts of water to the vermiculite as you mix it. Make sure it is mixed well. Typically for pythons and colubrids add enough water to clump the vermiculite slightly when you squeeze it into a clump. No water should come out and it should flake apart. After the eggs have set up in a day or so note the amount of water condensation within the container and its lid. It should be slight if at all, not dripping!!! A wet egg box will KILL the eggs, they will turn green, smell and mold up. Eggs do not have a method of dealing with too much moisture, the eggs will absorb whatever they are in contact with. For lizards such as monitors I use the same technique as with pythons. I like to bury monitor eggs completely as they are buried by the nesting feamel and water dripping on some species eggs can destroy the eggs. For lizards such as dragons, uros, and frills I tend to go a bit drier. I have noticed that many lizard eggs will not tolerate being directly moistened and may actually die if hit with water spray. I moisten the substrate and not the egg and then cover the egg. Perlite as an incubating substrate is used with a good deal of success but I am not well versed on the exact techniques of this substrate. Be careful a substrate if kept too dry can extract prescious moisture from the egg! IMPORTANT - it is easier to save an egg that has dried out a bit from low humidity than to save one that has been exposed to too much!! Don't go overboard! A white egg that is dimpled or caved in is acceptable and can easily be fixed by wetting some of the medium and putting it over the eggs for a day or two. An egg that appears a bit dimpled(snake) is nothing to worry about, some eggs may fill out while others look a bit caved in. A living healthy egg will absorb the extra direct moisture. If the eggs are turning foul, moldy, green, yellow or blue this is a dead or dying egg. This is also a good indication that it is too moist. Remove all bad eggs whenever possible, do not damage an attached egg by the removal of a bad one. Many eggs if healthy and provided the proper environment will exist attached to a shriveled dead egg. If they go moldy and turn colors they will often damage the attached egg and are typically easy to remove as they decay!! If this occurs you may want to rethink if the eggs are too wet. Tortoise eggs in my opinion are the hardest to read and candling is the best method of checking, time will tell! look for blood vessels attached to the egg wall after 10 -20 days in a developing egg to see if it is fertile. I often see gorgeous white tortoise eggs that are sterile and will never develop into a baby tortoise.
Hatching Green Tree
python eggs (Chondropython viridis)
These eggs can be problematic
for many keepers, there are slightly different incubating techniques
involved for success. I use a deep container with a base level of 12 - 14"
of vermiculite that is moister than usual. When squeezed in your hand it
readily clumps into a ball. This creates a humidity level of 100% within the
chamber. Create a depression in the middle to hold the eggs. I then place a
layer of 2 - 3" of slightly moist but not wet sphagnum moss over this and
place the eggs into this cavity and lightly cover with the slightly
moistened sphagnum. Periodically every two to three days I check on the eggs
and monitor the dimpling of the eggs. If they appear slightly dried out and
dimpled this is good, too dry and they will start to cave in. If they start
to cave in I moisten some of the sphagnum moss so that it is damp and place
it over these eggs. Within a few days they plump out and look better. If
the eggs are too moist they may initially appear perfectly full w/o the
slightest dimpling, this is not a good thing and you should dry them out a
bit. You can kill these eggs by exposing them to high levels of moisture!
Since the eggs may typically hatch out in 47-52 @ 90F I like to drop the
incubating temps at day 45 to 86F. As eggs mature they create some of their
own heat and may potentially become too hot with this added fact. I also
begin spraying the eggs directly with tepid/warm water to soften the shells
at day 47 to hatch. I feel this softens the egg and makes an easier time for
the little guys.
As an egg matures - As an egg grows it often grows in mass and draws its moisture from its environment and nourishment from its yolk. We often notice that snake eggs will often cause the egg chamber to sweat as they prepare to hatch. They are warming up! They are actually creating a bit of their own heat which may be several degrees in larger clutches. At some point in the incubation process large clutches may create too much heat and actually cause embryo death and deformaties. Watch out for this on large clutches, check your temps as time passes. I generally incubate all python eggs at 90F but it seems a bit wiser to incubate large clutches at lower temps such as 88F. I learned this the hard way when incubating a clutch of blood python eggs. They generated too much heat since it was a massive clutch and the babies hatched with an unusual number of birth defects. I had kept them too warm! This whole event can be observed by using two digital thermometers or a raytec gun to measure the egg box temp and the temps of the egg mass! Be careful with too much heat.
Close to hatch - the eggs shell becomes soft or brittle as the animal releases enzymes to break down the shell. This enables the baby to cut or break free from its shell. With pythons I often seperate the eggs from each other a few days before they are due to hatch, this prevents snakes from slitting into another egg and possibly drowning. The eggs are easier to seperate at this point and can be done with relative safety if care is taken and the eggs are not rotated.
Egg handling - Rule of thumb is not to rotate the eggs from their original position. As an egg develops it attaches blood vessels to the walls of the egg for oxygen absorption. If the egg is rotated there is a chance of the vessels pulling free and a resulting death of the embryo. I use a pencil to mark the tops of eggs and number them with large clutches. The lead graphite is harmless and works well.
After taking the Eggs
away - Pythons
Maternally incubating pythons
react to the smell of the eggs and will often try to brood a clutch of eggs
that are no longer within her coils. This is due to the smell of the
eggs being left on her. She will often continue this behavior and refuse
food until the eggs hatch or the smell disappears. To correct this situation
I will take a recent laying female and wash her off with diluted dish
washing detergent and rinse her down with water. This removes the odor and
often gets them back on feed.
Egg Viability - Are the eggs viable?
White consistent
looking eggs are typically a good sign of a viable egg. Some eggs may
have transparent spots that are not calcified, this is fairly common and not
a great worry. I have had eggs (snakes) that are nearly half this way with a
nippled end and have hatched a perfect but smaller baby. They are more
likely to die in the incubation process than perfect looking eggs. After
7-10 days the eggs can be candled with a mag lite to observe for the
presence of blood vessels along the egg wall. Shine a bright light into the
egg and look for the red blood vessels attached to the egg wall. If you see
them you have fertile eggs!
Yellow eggs , small,
nippled on each end are good indicators of an unsuccessful clutch. Small
yellow eggs are released ovum that were never mature or viable at ovulation.
o the oviduct where if fertile or viable they would grow and calcify.
White perfectly eggs
that go bad after 4-8 days are often an indication that they were viable
ovum as the animal ovulated but there was no sperm present to fertilize that
egg or the entire clutch. Initially the eggs look perfect but soon fail
regardless of incubating practices. These eggs may be the result of a female
that went through a breeding cycle w/o the presence of a breeding male or
successful copulation. If candled they should have no blood vessels since
they are infertile.
Off White eggs that
don't stick together (snakes) that may feel waxy are typically duds.
Don't confuse these with just laid eggs that often turn whiter shortly after
being laid.
What should they look
like?
Colubrids (kingsnakes, corns,
hognose, racers etc.) are typically long like an over sized jelly bean to a
good and plenty. Occasionally some snakes lay incredibly long eggs! Soft
pliable exteriors.
HOGNOSE - these guys love to
eat their own eggs so watch those mothers!
Pythons, generally these
eggs are more chicken egg shaped. Some are rounder such as green tree
pythons and some are longer such as burrowing python eggs. Soft pliable
exteriors.
Lizards are typically jelly
bean shaped and some such as gecko eggs are round. Many lizards such as
geckos have very thin shelled eggs that are brittle and easily destroyed
when touched. Some of their eggs are pliable like python or colubrid eggs
while the eggs of many geckos are hard like miniature bird eggs.
Turtles/Tortoises, these
eggs too vary a great deal. Many tortoises have round hard walled eggs. Box
turtles may have long eggs. The eggs of turtles are not pliable, they are
much like bird eggs and can be easily broken w/o proper handling techniques.
Do not rotate these eggs whenever possible.
Placement of eggs on the
substrate
I will typically try to
cover eggs half to two thirds the way with the vermiculite. This is not
always critical if the humidity levels are sufficient within the egg
chamber. Remember the eggs absorb much of the needed moisture from the
medium that they are in contact with!
How long should they take
to hatch?
This depends on the species
and the temperatures used. A higher temperature within that species
requirements may cause the earliest possible hatch out. Some species like
chameleons may require temperature swings to provide a continual embryo
growth. If held at a constant temperature they may stall and this could slow
the process down to a crawl. Each species is exact in its own right, some
animals are well known and the temps are well known while others may require
nothing like we expect! I have had veiled chameleons take on average 150ish
days at 84F. I have had Argus monitors eggs take 2 days short of six months
at the same temps while it may only take 55 days to hatch a kingsnake @ 84F.
Some tortoises such as Leopard tortoises vary from sub species. A pardalis
babcocki may take 85 days at 84-86F while the Pardalis pardalis may take 250
days at the same temps. Know your species!! Realize this, some animals
may hold the eggs within themselves for a longer period and embryo
development may be further along and this could result in a shorter
incubation period!
Temperature Examples (I
need to update, off the top of my head!)
Pythons -
Burms, balls, macklotts, womas,
carpets, water, etc. typically incubate at 90F for 55 - 65 days.
Pythons - Retics
papuan pythons typically take longer and often hatch around 88 days @ 90F.
Pythons - Green
tree pythons often hatch at 47-51 days @ 90F. Burrowing pythons may have a
broad window of 37 - 60 days @ 90F, this may due to the fact that the
carrying female held the eggs longer and development was further along by
the time the female laid.
Colubrids - Kings,
corns etc. Typically 50 ish days @ 84F
Colubrids -
Indonesian ratsnakes, mangrove snakes etc. Temps a bit higher than kings of
86 - 88F for 90 - 100 days.
Chameleons - A huge
window with a wide temperature range.
Dragons - I often
do not pay attention but I think 50ish days @ 84 - 86F.
Monitors -
typically long incubation periods of 3 - 6 months @86- 88F.
Tortoises - A huge
window 50 - 250 days. Example such as a star tortoise may take 84 - 178 days
at the constant temperature of 88F.
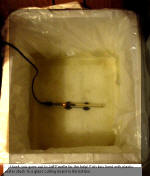
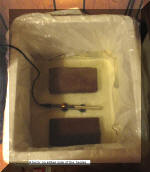
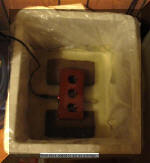
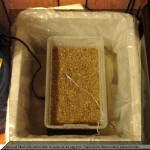
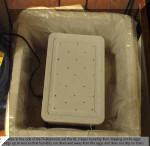
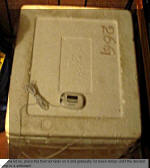
Here are some pictures showing the steps in order of one way you may make your own egg incubator!!
